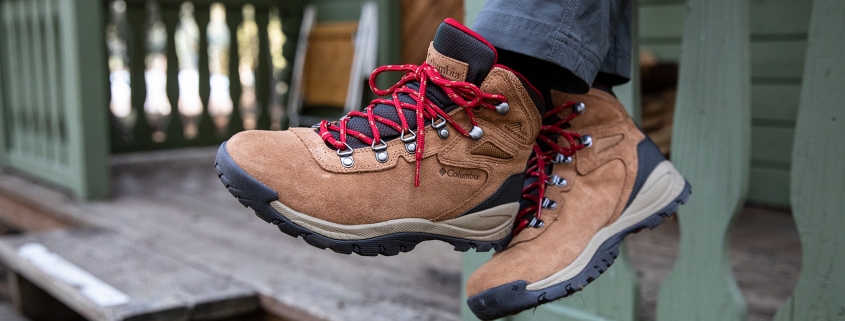
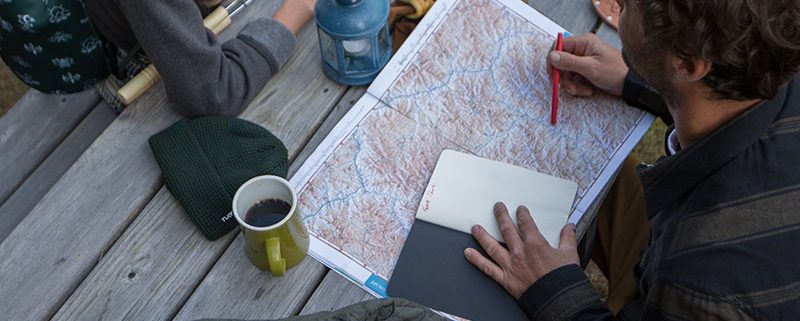
What’s better – waterproof or non-waterproof boots? That’s one of the most common questions our footwear experts get. And the answer is, well, it depends. Here’s a few factors to keep in mind.

What is Waterproof Really?

Hiking boots are often constructed of waterproof materials, such as leather finished with DWR (durable water repellant). But this construction only makes them water-resistant. A boot that is truly waterproof generally has a sock-like liner constructed of a seam sealed waterproof membrane, such as Gore-Tex, sandwiched between the exterior layer and liner of the boot. A water resistant boot will keep your feet dry through a light drizzle or occasional puddle, but during more heavy exposure some water will likely leak in through the seams.

When to Choose Waterproof

Waterproof boots are excellent for hiking in heavy downpours, frequent stream crossings, and trudging through snow. They are our go-to for fall and winter hiking, as well as backpacking trips with unpredictable weather.

One important factor to keep in mind is that to achieve water impermeability, breathability is sacrificed. That means that waterproof boots will be warmer than non-waterproof options. They will also be slower to dry out if they do get moisture inside – for example, from sweaty feet. So if you tend to run hot, waterproof boots may not keep your feet as dry as a non-waterproof boot. You’ll also want to be sure to pair your boots with a moisture wicking merino or synthetic sock.

When to Choose Non-Waterproof

For warm weather hiking, breathability is key, so non-waterproof boots really shine on summer hikes. Because they dry out quickly, they’re also a great option for deep river crossings, where your feet will inevitably get wet. Non-waterproof boots also tend to be slightly lighter than waterproof boots, making them a great choice for hikers who favor fast and light pursuits. Waterproof boots are generally slightly more expensive than non-waterproof options. So if budget is a big factor for you, a non-waterproof boot may give you a little more bang for your buck.

The Bottom Line

The unparalleled protection from the elements offered by a waterproof boot comes with a reduction in breathability and a higher cost and weight. If you’re serious about year round hiking, having both waterproof and non-waterproof boots to use in different circumstances is ideal. If you’re just getting started and have a limited budget, consider your personal preferences and the kind of hiking you’ll be doing most often. It’s also a good idea to get expert advice and try on a variety of boots. Stop by Frugal Backpacker for a free fitting with one of our knowledgeable experts.

When I first told my mother that I wanted to major in Outdoor Leadership, she was scared. My mom did not have very much experience hiking, camping, or otherwise being in the backcountry. She was worried about the inherent risks that come with an outdoor lifestyle.

It took some convincing, but eventually my mother came around and began to feel more at ease when I ventured out past cell service. Here are 5 of my safety plan points that I follow for every trip. They put my mom’s worrying head at ease, and me and those I am traveling with safe.

  1. Plan ahead and share your plan:

This one seems like an obvious no brainer. You need to have a generalized itinerary before starting a trip. Knowing how much time to drive to the trailhead, a general location of your campsite(s), water sources, and known points of cell service. However, the part that is often forgotten is to share your plan with someone else. It’s important to share your plan with someone who will be in civilization so that if anything goes wrong, you will have an exit strategy.
This is the part of the safety plan that helped my mom the most. When she feels included in my plans, she feels like she will be able to do something in an emergency, and feels better than if I just tell her “I’m going to be in the woods for two weeks. Call you when I get home.” Having information about my location helps her to be able to keep an eye on weather (sometimes texting me warnings if a major storm is approaching). It is also helpful in the case of an emergency on my end. I haven’t had it happen yet, but if I ever don’t show back up into civilization within a day or two of my original plans, my mom would know that something happened, and be able to contact the local authorities to begin searching.

  1. Bring extra food:

This one is always easy for me to do. I naturally err on the side of bringing more than enough food. Usually whenever I come back from an extended trip, I have at least one day’s worth of food left over. This is completely intentional. Sometimes weather, injury, or just enjoying a camping spot can lead to a zero mile day, and you end up needing to eat for one more day than you originally thought. If you’re going on a day hike, bring at least one extra snack.

  1. Bring protection:

My mom’s biggest worry for me has always been being a single woman alone in the woods. Naturally, a mom will worry about her daughter doing anything that carries inherent risks. Add hearing too many horror stories to that natural worry, and my safety became an obsession anytime I told my mom plans to go on a solo hike. One way that I’ve been able to help put her more at ease is carrying bear spray and a pocket knife.

  1. Bring a med pack

I know a lot of people who think that carrying the extra weight of a med-pack isn’t worth it. I disagree. I’ve been able to help many people on trips by carrying some bandages and antibiotic ointment. I’ve been able to tend to wrap my own dislocated ankle and hike to the nearest exit point (that had already been highlighted on my trail map during planning ahead and preparing). I feel more at ease knowing that I’ll be able to help myself or others because I have some basic first aid necessities in my pack.

  1. Keep a journal

This one is important to me for two reasons. The first is that keeping a journal of your travels can help with planning future trips. If you want to go on the same route again, you’ll be able to look back at your notes and avoid the problems you faced last time. You’ll be able to see which areas you want to spend more time in, and areas that are more prone to congested campsites.

It’s also been helpful to my mom to read through my journals to see how seriously I take my safety, and how much I enjoy being in the wilderness.

There are many other important aspects to safely navigating backcountry. These are just the five that have helped my mom feel at ease the most. Remember that all adventures carry inherent risks that cannot be controlled, but you can be prepared for.

JOIN OUR NEWSLETTER

20180118_Gear

After a few days in the great outdoors, the last thing you want to do when you finally get home is tackle the task of cleaning your gear—we get it. But, as any outdoor enthusiast knows, gear is pricey stuff—and that’s if you buy it once. However, putting in just a little bit of time and effort into keeping your gear cleaned, fixed, and stored properly has big impact on its lifespan and performance.

Fortunately, many wear-and-tear issues can be eliminated with proper maintenance and storage, and most damage can be addressed without replacing the item. By getting into a “Repair > Replace” mindset, you’ll save money and be more environmentally friendly. Your used gear is already part of the waste cycle, and by repairing instead of replacing, you’re reducing the carbon output of the manufacturing process.

We’re stoked to see brands jumping on board with this. From Osprey’s All-Mighty Guarantee to Patagonia’s Worn Wear initiative, eco-conscious brands actually encourage customers to repair their gear. A great place to start is your local gear shop for a variety of repair kits, including waterproof patches, hammock and tent kits, seam tape, and more. And, if it’s a bigger fix you don’t feel equipped to handle, many brands have a warranty repair program.

Fortunately, you don’t have to be an expert to keep your gear in good working order; it just takes discipline and know-how. Here are some insider tips on how to clean, repair, and store your big-ticket items, which will keep more money in your bank account and raise your dirtbag cred at the same time.

Tents

3C5uQZstxu0m6AOusMgMS0
Your tent is your home away from home; treat it with some extra TLC to keep it functioning well.

Paxson Woelber

Cleaning: Before breaking down your tent, pick the whole thing up and shake it out, removing potentially abrasive debris. For a more thorough cleaning at home, set up the tent and wipe down the fly and body with a diluted mixture of hand soap and warm water. Never use detergent or put the tent through the washing machine—it can damage any protective coatings.

Repairs: Silnet is a great product created specifically for treated nylon products like tents. It works like Super Glue and can be used for seam reinforcement or to fix pinhole tears. Small rips in the mesh can be repaired with mesh repair patches, which have an adhesive that allows you to fix the tear without a sewing kit. Clean fabric with rubbing alcohol beforehand, allowing sufficient drying time, to help the patches stay in place.

Storage: The first rule of thumb: Always store your tent flat and clean! Resist the urge to crumple it into the bottom of a stuff sack. Yes, it’s so easy to let camping gear get strewn everywhere after a trip, but take the time to lay your tent out and fold it along the seams, where it’s least likely to crack, and you’ll improve its lifecycle.

Down Jackets and Sleeping Bags

Cleaning: Experts recommend washing down items at least every season, which helps maintain the loft and warmth-to-weight ratio. Find a front-loading machine (the agitators in top-loading machines can damage the fill) and wash on a gentle, cold cycle with a small amount of down-specific wash. It helps to add a few other items in the machine to balance the spinning. Tumble dry on a gentle setting, checking often—if the dryer gets too hot, the face fabric can melt. When the item is nearly dry, add a few tennis balls to the dryer to break up any clumps of fill.

Repairs: A small tear in the face fabric shouldn’t be the end of a jacket or sleeping bag. Take a glance around any group of outdoorsy folks, and you’ll see gear decorated with patches of duct tape, which is all it takes to fix a small tear.

Storage: Always stash your down items at their highest loft possible, which means don’t compress them into tight bags for long-term storage. Leaving down compressed can degrade the loft and creates weakness in material treatment. Upon returning from your trip, remove the sleeping bag or jacket from its stuff sack and shake it out. Your sleeping bag likely came with a large mesh or lightweight bag—perfect for storage. If you don’t have the original, you can find one online or at a local gear shop.

Rain Gear

Cleaning: Rain gear needs to be washed a few times per season, especially gear with an ePTFE membrane. ePTFE is an expanded plastic membrane with 9 billion pores per square inch. This technology creates a waterproof, breathable layer that prevents water drops from saturating, but allows the vapor to leave. ePTFE—utilized in garments listing Gore-Tex or eVent—is oleophobic, which means oils from your skin can clog the microscopic pores and cause the jacket to lose breathability. No matter what the waterproofing, rain gear has a Durable Water Resistant (DWR) treatment on the face fabric, and residue from campfires and other contaminants can reduce the effectiveness of the coating. Washing garments with mild powder detergent or a tech wash will revive it.

Repairs: Feel like your older raincoat is losing waterproofing? Make sure you’re not just sweating it out—the jacket might just need to be washed. Second, check along the seams. If you find a seam failure, a product like Seam Grip can come to the rescue. For small tears on the face fabric, a patch kit from the manufacturer or your local gear shop will do the trick. To revive an older garment, give it a DWR treatment and it’ll feel nearly good as new.

Storage: Store your rain gear out of direct sunlight, preferably hanging up and not crumpled. This will help prevent the laminates from cracking. And it should go without saying, but never shove the jacket into the closet when it’s still wet, which breeds mildew and other funky, damaging stuff.

Hiking Boots

3sSR8DmAtOcMe6YwwiuuUQ
Putting some effort into taking care of your hiking boots means they’ll really go the distance on the trail.

Cody Ash

Cleaning: While much of the backpacking world is migrating to synthetic trail shoes, leather hiking boots still hold a corner of the market. Keep yours clean and supple by scrubbing dirt off with mild soap and an old toothbrush, and treating with a leather cleaner every few months. Never put boots through the washing machine.

Repairs: If your waterproof boots are wetting out, apply a waterproofing agent, following the package instructions. If the outsole is beginning to separate, it might be a job for your local repair shop, or you can try to DIY by applying an adhesive like Shoe Goo.

Storage: When it’s time to put away the boots for the season, clean them thoroughly before storing them, removing all caked-on dirt. If the midsoles are removable, pull them out to allow ventilation.

Backpacks

Cleaning: Have you ever given your backpack a thorough cleaning? Probably not, which means the straps are caked with sweat, the bottom is filthy, and something spilled inside at least once. Hand wash the pack in the tub with mild hand soap, turning it inside out and scrubbing inside every pocket. If you run the pack through a front-loading washing machine, place it in a pillowcase to avoid getting the straps and buckles caught. Always air dry—dryers can wreak havoc on the synthetic material, zippers, and other features.

Repairs: There are a lot of things that can go wrong with a pack, and most don’t warrant a full replacement. Torn mesh, broken zippers, failing buckles, and fabric tears are all replaceable or easily fixed. Gear companies will likely send you the exact strap or buckle you need, and many will stitch mesh or fabric back together. Your patched-up pack will have way more personality.

Storage: This one’s easy. Just store the pack clean without anything nasty caked to the inside.

Skis

Cleaning: If you choose to wax your skis yourself, you probably have a good idea of what you’re doing. In short, you’ll clean up the edges with a diamond stone, apply a coat of wax with an iron, let it cool, then thoroughly scrape it from tip to tail with a scraper. Brush with a brass brush, then polish with a fiber pad. Not sure how to do it? Watch a video or ask someone at a ski shop before tackling it for the first time.

Repairs: Take care of any dings right away—minor damages to the base can be peeled off with a sharp knife to prevent catching and dragging. The gouge can be patched later.

Storage: Clean and dry your skis, and take care of any minor burrs that could result in rust. Store skis upright, preferably in a rack out of direct sunlight.

Climbing Rope

8WQG41FsUoYImYuyIeikM
Your climbing rope is a critical piece of gear; make sure you take care of it properly.

Helen Cook

Cleaning: Self-preservation means keeping load-bearing (i.e. life-saving) gear in peak condition. Keep as much dirt off the rope as possible by flaking it on a rope bag or tarp when climbing outside, and never step on it. When your rope gets dirty, wash it with warm water and a designated rope wash and rope brush, feeling for soft spots, which can mean that section is core shot. Rinse thoroughly until the water runs clear. Hang the rope in large loops over a railing to avoid annoying pigtails as it dries.

Repairs: The best way to repair a rope you’re unsure about is to not repair a rope you’re unsure about. Don’t risk it. Turn it into outdoorsy home decor by making a lovely rug.

Storage: After thoroughly cleaning and drying your rope, flake it loosely into a rope bag or tie it into a butterfly coil. Store in a cool, dry place out of direct sunlight. When you take it out for the first use of the season, check the entire length up and down for soft spots.

JOIN OUR NEWSLETTER

Featured image provided by John Strother

20170906-Smoky Mountains-Clingmans Dome

Across the Great Smoky Mountains National Park, miles of interconnected trails meander through lush, green valleys, hug the banks of moss-laden, rocky creeks, and climb through thickets of mountain laurel and rhododendron to the blue-tinged mountain peaks.

You could spend weeks backpacking through this rich landscape, but a weekend trip will also allow you to experience the best of the Smokies. To help you plan your visit, we’ve highlighted three backpacking loops that give you the Appalachian Trail, streamside and ridgeline campsites, killer views, and enough distance and elevation to satisfy your inner weekend warrior.

Big Creek Loop

Combining the best of front-country and backcountry camping, the Big Creek area on the northeastern tip of the park off I-40 offers something for every level of hiker. Tackle a 21.5-mile loop over big peaks or lower your mileage and elevation with a night at one of the sweetest creekside campsites in the park. Either way, you’ll hike the AT through some of the most scenic terrains in the Smokies.

You will be in constant awe of the beauty on Big Creek Loop.

Rock/Creek

Roll into Big Creek Friday night to enjoy campground amenities like restrooms, dinner at a picnic table, and campsites with fire rings. You’ll be up early on Saturday to climb the Chestnut Branch Trail 2 miles to the Appalachian Trail. One of the shortest AT access points, the trail passes the remains of homesteads that pre-date the national park.

Turn south on the AT and continue climbing 3.3 miles to the 0.6-mile Mt. Cammerer fire tower spur trail. At 4,928 feet, the tower overlooks the Pigeon River Gorge to the north and Mt. Sterling to the south. From the fire tower, it’s a moderate descent 2.1 miles to the Low Gap Trail. Take Low Gap 2.5 miles to campsite #37 at the Big Creek Trail junction. Right on the banks of Big Creek, you’d be hard pressed to find a more spacious backcountry site in the park.

On Sunday, you can go big or go home, as they say. Going big means a hike up the Swallow Falls Trail 4 miles to the Mt. Sterling Ridge Trail. It’s another 1.4 miles and more climbing to an elevation of 5,842 feet on Mt. Sterling. Climb Sterling’s 60-foot steel fire tower for panoramic views of Cataloochee Valley, the Black Mountains, and the Southern Appalachians. Now, the downhill endurance test begins, with a 4,000-foot elevation loss over 6 miles on the Baxter Creek Trail. If you opt to go home, you can sleep in, savor your coffee by the campfire, and still have plenty of time to hike the moderate, 5-mile descent along Big Creek back to the campground, passing two stunning waterfalls and plenty of swimming holes along the way.

Big Creek loop ends with a 4,000-foot elevation loss over 6 miles on the Baxter Creek Trail.

virgntn2011

Big Creek Campground is open from April through October and makes a great base camp for groups by serving a wide variety of abilities and interests. On your way home, make sure you leave enough time to refuel at Carver’s Apple Orchard in Cosby, Tenn. At Carver’s you can shop for fresh produce at the farmers market, nab awesome treats at an old-time candy shop, and feast at a homestyle restaurant, where the apple fritters are not to be missed.

Twentymile Loop

In the southwest corner of the Smokies, you’ll find a lesser-used trailhead that leads to the AT and one of the most scenic balds in the park. From this trailhead, you’ll log 17.6 miles on the way to Gregory Bald, sleeping one night on the AT and camping the other night on the bald.

Start off Friday afternoon at the Twentymile Ranger Station off Highway 28 near the border of North Carolina and Tennessee. A non-technical climb takes you 4.5 miles to meet the AT at Sassafras Gap. Campsite #113, at Birch Spring Gap, is less than 1 mile north of the trail junction. If time allows late Friday or early Saturday morning, head south on the AT for 360-degree views at sunset or sunrise from the top of Shuckstack Fire Tower. The historic lookout isn’t regularly maintained, so watch your step on the 200-foot climb to the top.

In the southwest corner of the Smokies you’ll find the lesser-used Twentymile Loop trailhead.

Chris M Morris

You’ll resume your northward journey on the AT, traveling 2 miles over Doe Knob to the next trail junction. Next, take Gregory Bald Trail west a little more than 3 miles to campsite #13 on the bald. Known for spectacular flame azalea blooms each year in mid to late June, the grassy high-elevation meadow offers stunning views of Cades Cove, Fontana Lake, and Clingmans Dome.

On Sunday, make the final 6.3-mile descent to the trailhead on the wide, non-technical Wolf Ridge Trail. Refuel at Fontana Village, just over 6 miles down Highway 28, before heading home. Burgers and brews will hit the spot at Wildwood Grill, while the Mountainview Restaurant highlights seasonal produce, along with fresh, local rainbow trout.

Deep Creek Loop

Along Deep Creek loop you’ll pass Indian Creek Falls.

Alan Cressler

Enjoy the streams and waterfalls of the Deep Creek area in the south-central region of the Smokies on this 28.2-mile loop. You’ll also spend a night in an AT shelter and exit on one of the longest continuously descending trails in the Smokies.

You’ve barely left the Deep Creek Ranger Station before you come across Tom Branch Falls and Indian Creek Falls. Once you pass these Instagram-worthy stops, it’s a slight uphill grade for 4 miles along the moderately rocky Deep Creek Trail to campsites 54-59. Claim a site for Friday evening (all but one are non-reservable) to enjoy the refreshing waters of Deep Creek and thickly wooded campsites.

Creek crossings and easy bushwacking are on the agenda Saturday, as you hike another 4 miles to the Fork Ridge Trail. Fork Ridge ascends 5 miles to Clingmans Dome Road and the AT. A short hike north takes you to the Mount Collins shelter, where you’ll spend the night in a high-elevation spruce-fir forest and dramatically cooler, drier conditions. Enjoy the shelter amenities, like cozy bunks and a fireplace inside.

Hike down from Clingmans Dome Road to start your final 11.4-mile descent.

Kevin Stewart Photography

The pre-dawn hike south to Clingmans Dome is highly recommended for 360 degrees of sunrise from the highest point in the Smokies. Hike 2 miles down Clingmans Dome Road to the Noland Divide Trailhead to start your final 11.4-mile descent. The trail slopes gently for the first 5 miles before making a steeper drop into Deep Creek, but there are few roots and rocks to slow you down. Make sure you stop to enjoy the views at Lonesome Pine Overlook along the way.

After logging all those miles, nothing’s going to taste more satisfying than a meal and craft beer at The Warehouse at Nantahala Brewing Co. Wrap up your Smokies adventure on the outdoor patio in downtown Bryson City with specialties like the slow-cooked brisket noodle bowl, apple bourbon pork chops, or Bryson City Brown Ale chicken along with a flagship or seasonal draft.

JOIN OUR NEWSLETTER

Featured image provided by Kevin Stewart Photography

My first backpacking trip was a fiasco. Because I was inexperienced and took some rather questionable advice, I found myself in a wilderness area on a rainy weekend, with a leaky tent, wet jeans, and a sopping down sleeping bag. That experience instilled in me two passions: testing gear before a trip and bringing the right clothing. Many years and trips later, I’ve dialed in the perfect combo for a happy (and dry) adventure, it all comes down to choosing the right fabrics and the right layers.

Fabric

  • Cotton: Repeat after me – cotton kills. While cotton is breathable and comfortable for casual activities, it has no place in your backpacking kit. Its propensity for holding moisture makes it heavy, sucks heat away from you, and causes chafing. Just don’t go there, especially with socks.
  • Wool: This isn’t the itchy wool sweater of your childhood. Ultra fine merino wool is soft, lightweight, and provides superior odor resistance – perfect for a few days on the trail. It also wicks moisture and dries quickly. Merino is my go-to for socks and base layer, but it does tend to be more expensive than synthetic options.
  • Bamboo: It’s not just for pandas anymore! Rayon made from bamboo is one of my favorite fibers. It offers great moisture and odor control, and I think it’s one of the most breathable fabrics out there. It’s not as widely available as synthetic or merino options, but SC-based Free Fly Apparel makes awesome tees, tanks, outerwear, shorts, and even undies from this wonder fiber.
  • Synthetic: Synthetic fabrics include outdoor staples like polyester and nylon. These fabrics tend to be durable, inexpensive, and handle moisture well. They are also typically the lightest weight options. However, they tend to be less breathable and take on odor more quickly than their natural fiber counterparts. I find quality makes a huge difference in comfort here, so it’s worth opting for better brands like Patagonia, Prana, and Arc’teryx. I typically opt for synthetics for pants and outerwear.

Base Layers

Since these pieces sit next to your skin, they are some of the most important apparel choices that you’ll make. Opt for comfortable moisture wicking fabrics.

  • Underwear: Cut and fabric are largely personal preference, it’s a good idea to purchase a couple pairs and try them out during active pursuits to get a feel for what’s comfortable for you. Merino wool, bamboo, and synthetic are all great options. Depending on the length of your trip, bring 2-3 pairs to give you time to wash and dry them. Most options from outdoor brands feature anti-microbial treatments so you can go longer between washings.
  • Bras: Simple designs are best, clasps and other hardware can cause chafing or dig in to your skin. Sports bras are great option, but since you’ll be wearing it all day, try to steer clear of “major masher” bras. If you’re comfortable with light support, camisoles are another great option.
  • Base Layer Tops/Bottoms: A must have for cold weather backpacking, these can be worn under other layers and make great options for cozy sleepwear. Merino and synthetic options are available in a variety of weights, ranging from light to heavy.

Primary Layers

  • Tees/Tanks: The perfect lightweight basic. A moisture wicking fabric is key. Consider bringing an extra tee to keep clean for sleep. Pay attention to the neckline, a wide or scoop neck may not provide protection from your shoulder straps and may cause chafing.
  • Woven Shirts: A lightweight collared shirt with long sleeves is worth bringing to provide breezy protection from bugs and the sun. Look for options that offer UPF 50+ for sun protection. If bugs are a concern, consider shirts that are treated with permethrin for bug repellency.
  • Pants/Shorts: When deciding between pants and shorts think about weather and what kind of trails you’ll be traipsing on. On hot days, shorts can be a welcome break, but if you’re going to be braving dense or brambly trails, pants will offer more coverage. Many hiking pants offer the best of both worlds with length adjustments such as zip-offs (handy, but can be fussy in practice), roll up snaps (my personal favorite), or cinches. Waistband design is another important consideration. Since you’ll be wearing a hip belt, pants with a lot of hardware can cause chafing. Make sure you try your pack on with your pants and look for any potential hot spots. Stick to a nylon blend if possible. While yoga pants or tights can be tempting, they do not offer much in the way of protection from bugs and are susceptible to abrasion.

Outer Layers

Regardless of season, you will likely want at least one insulating piece or shell in your backpacking kit, most of the time two.

  • Fleece or Merino Tops: These are perfect for hiking in on colder days. On warmer days, it’s still lovely to have a cozy layer to slip into at basecamp. Look for sleek pieces without a lot of hardware or pockets for easy layering.
  • Insulated Jackets or Vests: A synthetic or down insulated jacket or vest is a great way to be prepared for sudden cold snaps. Look for one that compresses easily and features a moisture resistant face fabric. As a bonus, toss it in a compression sack for a cozy pillow.
  • Rain Gear: In WNC, rain gear is a must have. A high quality waterproof/breathable jacket with pit zips will keep you dry and sweat free, and makes a great lightweight wind blocking layer on drier days. For rain pants, look for generous side zips and an adjustable waist for easy on and off.

Accessories:

  • Socks: Quite possibly the most important apparel item in your kit. Wool blends are the way to go for moisture (ie. blister) and odor control. Try your socks out well in advance of your trip and experiment with different heights and cushion levels til you find one that works well for you. Make sure to bring a clean pair for sleep and give your socks plenty of time to air out.
  • Hats: A must-have for warmth and sun protection. A wide brimmed hat or billed cap is great for keeping the sun off of you while hiking. Consider bringing a simple wool or synthetic beanie for chillier weather or warmth while sleeping. Buffs are another great option, they don’t take up much room and can serve as neck gaiters, headbands, or be converted to a beanie. I always keep a couple in my pack.
  • Sleepwear: Regardless of the season, a couple days on the trail are sure to impact your odor. It’s a good idea to bring a light base layer or other clothing reserved just for sleeping. Trust me, your tent mate will thank you.

JOIN OUR NEWSLETTER

If you’re an avid hiker or car camper, but crave an immersive experience with mother nature, backpacking may be your perfect solution. Not sure where to start? In this series, we’ll explore everything you need for a successful backpacking experience.

Grab a Buddy

It’s always safest to hit the backcountry with a partner. If you have friends who are experienced backpackers, ask them to join you on a short trip – most backpackers are eager to share their experience with newbies.

If you can’t find someone with backpacking experience, grab an adventurous friend who’s willing to give it a try and head down to Frugal Backpacker. Our experienced staff members are always happy to share their expert advice, we also regularly host free outdoor skills clinics.

Pick a Route

Main factors to consider are length of trip, distance/difficulty, and time of year/weather. For first timers, it’s a good idea to dip your toe in with a 1-2 night trip. When planning your daily distance, keep it comfortable. 3-5 miles is a good distance if you plan to hike half the day, plan on 5-8 miles if you’d like to hike all day. Plan on less distance if your route involves a large elevation gain, you or your companion are not used to hiking long distances, or if it’s winter (setting up camp in the dark is no fun).

Once you know what kind of route your looking for, get to work! Asheville Trails, RootsRated, Backpacker.com, and All Trails are great web resources. Frugal Backpacker also sells several local guides with detailed information on awesome routes.

To get you started, here are a couple of our favorite beginner routes:

Max Patch Loop via Appalachian Trail EASY 2.8 mile loop

Loop over and around Max Patch, a high-elevation bald that provides a grassy perch for observing the Black Mountain Range’s 6,000-foot behemoths (extend the trip to Roaring Fork for a 7.6-mile day).

Carver’s Gap Trail MODERATE 13.6 mile point to point

Also Along the AT, hike from shelter to shelter or camp in designated areas, beautiful balds and views. Carver’s Gap is also a great winter hike. More advanced terrain than Max Patch.

Be Prepared

It may not be the most fun part of trip planning, but preparation is important and lifesaving. Follow these four steps to make sure your trip is memorable for the right reasons.

  1. Regardless of the resources you use to select your route, purchase a paper map and carry it with you. Technology does fail; map and compass skills are essential to backcountry safety.
  2. Although natural disasters are rare in WNC, as last year’s wildfires demonstrate, they do happen. Take the time to study your map ahead of time and plan out alternate “escape routes” for worst case scenarios.
  3. Don’t forget to research restrictions and permit requirements before hitting the trail. The National Parks Service or North Carolina Forest Service should be able to provide you with the info you need.
  4. Familiarize yourself with our Outdoor Safety Basics.

JOIN OUR NEWSLETTER

One thing we’ve found to be almost invariably true is that people who love the outdoors also love food. Food is, after all, one of life’s pleasures, and is rarely appreciated more than when you can dig into a hot and satisfying meal around a campfire, after a hard day of hiking. But when it comes to backcountry cooking, effort is required to ensure that your meal is not only delicious but also provides you with the energy and nutrients you need to keep going.

Calories

The most important factors to consider is calories- you’re going to need a lot of them. The average adult burns about 2,000 calories a day, but just one hour of hiking can burn somewhere between 500-700 calories, so a full day of hiking can easily triple your body’s calorie needs. These numbers can also vary based on your metabolism, physical fitness, difficulty of hiking, and even the temperature outside, so while these guidelines are helpful, we highly recommend erring on the side of caution and bringing a bit more food than you will need, especially if you’re new to hiking and are not used to your body’s particular calorie needs.

Calories come from three sources: Fats (9 cal/g), Proteins (4 cal/g), and Carbohydrates (4 cal/g). Since fats are the most calorically dense, including a high percentage of fats will make it easier to meet your calorie needs, however, balance is key. To feel your best and hike most efficiently, you need a healthy combination of all three groups.

Meal Planning

Breakfast- There’s a reason oatmeal is a favorite meal for hikers. It’s lightweight, easy to carry, and chock full of fiber from whole grains. We like to pack pre-measured baggies with 1 cup of oatmeal and 1 tbsp chia seeds, for an extra boost of fat. You can also throw in some dried fruit, nuts, and a protein shake pouch to add some extra nutrients and protein.

If you crave a more traditional breakfast, a number of brands make dehydrated or freeze-dried breakfast scrambles.

Lunch- Most hikers prefer to eat lunch on the go, rather than stopping and cooking. That makes portable no-cook food a priority. We like to be prepared with a variety of dried fruit, nuts, and energy bars (try Threshold Provisions’ bars, or if you’re feeling ambitious, whip up a batch of Phil’s No-Bake Bars -see below- before you hit the trail).

Wraps are also a great option, as tortillas are easy to transport and can be filled with a variety of trail stable foods. Depending on how long you’ll be on the trail, hard cheeses and meats that don’t require refrigeration (think summer sausage and some salamis) make excellent savory options. We also love peanut butter & banana, tuna (bring the pouch variety to save weight), or hummus (Fantastic Foods dehydrated hummus mix is available at most health food stores).

Dinner- After you make camp, you can afford the luxury of a hot meal. This can be a prepackaged or homemade dehydrated meal. We love the gourmet offerings from Good-To-Go like Thai Curry and Wild Mushroom Risotto. Shelf stable foods like ramen and boxed macaroni & cheese also make great budget-friendly options, just make sure to bring some protein and dehydrated veggies to amp up the nutrition value.

Extras- Having a few little luxuries can make all the difference.

  •  Coffee/Tea- European grocery stores often carry high-quality instant coffees. If you want to go the from-scratch route, pick up a backpacking pour over filter.
  • Hydration Tabs- Keeping your electrolytes up will help stave off dehydration and keep you performing at your best.
  • Spices- these can improve even the most mediocre meal. Staff favs include za’atar, minced onion, and crushed red pepper.
  • Peanut Butter or Coconut Oil- Great sources of extra calories and general yumminess. Bonus: coconut oil also makes a great moisturizer and provides sunburn relief.
  •  Chia Seeds- A great source of healthy fats and extra calories, these can be added to just about anything. Calorically dense water, anyone?

Favorite Recipes

Phil’s No-Bake Bars

“Wet” ingredients
1⁄4 cup Coconut Oil 1/3 cup Honey
2/3 cup Peanut Butter

Dry ingredients
1.5 cups of oatmeal (rolled or quick)
1⁄2 cup of walnut pieces (any nut is fine here)
1⁄4 cup of chia seeds
1⁄2 cup of shredded coconut flakes
1⁄2 cup mixed dates, chocolate, sour cherries (anything will work here, I just like these)

In a saucepan combine coconut oil, honey, and peanut butter over low to low- medium heat. Stir until homogenized and pour over dry ingredients. Mix until dry ingredients are completely coated. Transfer mixture into a prepared 9×9 pan and press until evenly thick from edge to edge. Put in the refrigerator for at least 2 hours to allow to set.

Mega Macaroni

1 cup kale or other leafy green washed, dried, and chopped coarsely

1/2 cup onion sliced into 1/4 inch rings

1 box Deluxe Macaroni & Cheese (preferably organic)

1 pouch albacore tuna

At home:

Using a dehydrator, dehydrate onions (6-12 hours) and kale (2-3hrs) at approximately 125 degrees. Once dehydrated and cooled, pack vegetables in a small ziplock bag. Repackage noodles in a separate ziplock bag. All other ingredients can remain in their original packaging.

In camp:

Bring a pot of water to a boil, then add noodles and vegetables, boil until noodles are al dente, then strain using a strainer lid or carefully pour the liquid off while using a spork to hold back noodles and veggies. Mix in cheese packet and tuna and cook until warmed through.

JOIN OUR NEWSLETTER


Western North Carolina is an outdoor enthusiasts paradise. Gorgeous views, rugged terrain, and temperate weather make it ideal for a variety of outdoor pursuits, including backpacking. However, nothing ruins an adventure as quickly as an ill-fitting pack.

A poor fitting pack can lead to a host of issues ranging from slight inconveniences to serious back issues. Such problems as back injuries, chafing, and instability, can be avoided simply by having a pack that fits you properly.

While the best way to get a properly fitting pack, is to have a professional fit you in store, there are scores of reasons to know how to fit your own pack. For instance, weight gain/loss can require tweaks to make your existing pack fit properly, and if you keep a spare set of gear to take less knowledgeable friends out, knowing how to get them the best possible fit is is a huge help. Really, knowing how to fit your own pack is an essential skill for any outdoor explorer.

Getting Started

The process of getting a perfect fit can be broken down into three basic steps:

  • Get your measurements
  • Personalize your fit
  • Check and adjust your fit

 Measure

1.  Find Your Iliac Crest: 
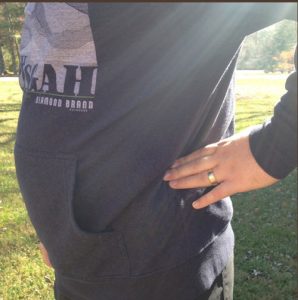
Iliac Crest

This is the point at the top of your hip bone. An easy way to find it is to point to your belly button and draw a line outwards to your hips.

This is the point where your hip belt will sit and from which you will measure torso length.

2. Measure Your Torso: 

If you stop by the store, we have a special tool that you can put on like a backpack that will determine your frame size easily.

If you are measuring at home, you can easily measure torso size with the help of a friend and a soft measuring tape.

a. Tracing your finger from your iliac crests toward your spine, find where they align horizontally. 

b. Standing up straight, place your chin down toward your chest. At the base of your neck, one vertebra should feel particularly prominent; this is your C7 vertebra. 
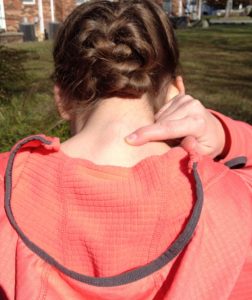
C7 Vertebra

c. Have a friend measure the distance between these two points, using a soft measuring tape. 

Distance between Il

d. Determine your base size based on the chart below.

Screen Shot 2016-06-12 at 12.23.00 PM

e. Determine Your Hipbelt Size: 

Hipbelt fit is very personal and depends on more factors than simple measurements. A good rule of thumb, when choosing hipbelt size, is to start with your typical pant size.

For instance, a woman who is a 4-6 would start with a size small hipbelt, and a man who is a 34-36 would start with a large hipbelt.

Personalize Your Fit

Now that you have your base measurements, it’s time to pick a pack and dial in a personalized fit. It should be noted that the measurements you’ve taken should be a starting point. You will likely have to adjust sizing as you try packs on. This is especially true if your measurements fall at the small or large end of your size range.

1. Size the Shoulder Straps:

Begin by loosening the shoulder straps from the Velcro panel holding them to the frame. Adjust the straps according to where your measurements fall on the size chart. For instance, if you are in the middle of a size range, make sure that the shoulder straps are placed roughly in the middle, etc.

2. Loosen All Straps:

Make sure that your hipbelt, shoulder straps, sternum strap, and load lifters are all as loose as they will go.

3. Put On the Pack

4. Adjust Your Hipbelt:

Hold up your pack so that the hipbelt sits squarely on your iliac crest, and tighten the hipbelt adjustment straps. Pull forward evenly on both straps to ensure an even and comfortable fit.

The fit should be snug, but not tight.

5. Adjust Your Shoulder Straps:

Pull down and back on both shoulder adjustment straps to tighten. The shoulder straps should sit snugly, but comfortably, on top of your shoulders.

6. Adjust Your Load Lifters:

These are the small webbing straps that run from the body of your pack to your shoulder harness.

Pull down on them gently till they are taught and you feel the pack resting close to your back. Typically they should be at a 45-60 degree angle.

7. Tighten Your Sternum Strap:

Make sure that your sternum strap is sitting in line with your breastbone. Tighten it slightly so that it’s keeping your shoulder straps in place.

Check and Adjust Your Fit

Now that you have your pack set up, double check your fit. Load up your pack with your gear or add 20-30 pounds of weight to get an idea of the weighted fit. Loosen up all your straps and put the pack back on as outlined above. Stand in front of a mirror or get a knowledgeable friend to help.

1. Check Your Hipbelt:
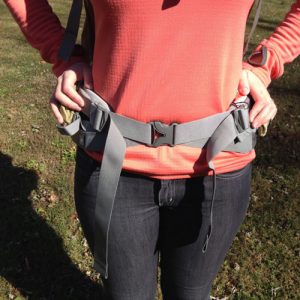
A properly fitting hipbelt

A properly fitting hipbelt

Make sure that your hipbelt is sitting squarely on your iliac crest. You should feel like your hips are carrying about 80% of the weight in your pack.

If you feel like your hips are carrying less than that, your hipbelt is likely sitting too low. Adjust it slightly higher.

Your hipbelt should curve comfortably around your hip bones, and you should have 3-6” of space between the pads on your hipbelt.

If you have much more room than this, you should swap your hipbelt out for a larger size. If you have much less than this, you should swap out your hipbelt for a smaller size.

2. Check your shoulder straps:

Properly Fitting Shoulder Straps

Properly Fitting Shoulder Straps

Your shoulders should feel as if they are supporting about 20% of your weight, if you feel that they are supporting much more than this, take a second look at your hipbelt.

Shoulder straps should curve up around your shoulder blades. The base of the strap should start around 2” below the top of your shoulder.

If the straps do not appear to be resting on your shoulder, you may need to readjust your shoulder harness to sit lower on the frame. If this does not fix the problem, you should start over with a smaller frame size.

The front end of the shoulder strap should sit about halfway down your rib cage. If the strap ends much higher than this, or if it is cutting into your shoulder, you may need to readjust your shoulder harness to sit higher on the frame. If this does not fix the problem, you should start over with a larger frame size.

3. Check Your Load Lifters:

The top of your pack should sit close to your back, and you should not feel like your pack weight is pulling you backward. If you have either of these problems, you should tighten your load lifters.

You should be able to move your head, and should not feel like your pack forces you to bend your neck forward. You should not feel any pressure pulling up on your shoulder straps. If you have any of these problems, you should loosen your load lifters.

4. Check Your Sternum Strap:

A properly fitting sternum strap

A properly fitting sternum strap

Your sternum strap should sit on your breastbone. It should be just tight enough to keep your shoulder straps in place.

If your sternum strap is pulling your shoulder straps in or restricting your breathing, it needs to be loosened.

Enjoy Your New Pack

You should now have a pack that fits you well. Keep in mind that beyond these steps, pack fitting is largely personal preference. Taking the time to try on a variety of packs during the selection process and following these recommended fitting steps, will give you the best fit possible. Happy trails!

JOIN OUR NEWSLETTER